Friday, December 7, 2012

From Here to There


From Here to There
Journal Kits
and a
GIVEAWAY
giveaway is now closed
PLUS:
Photos of how I've done 
a few of my journal pages!


I love making journals! It's December and I realized that I haven't made a journal in months! Suddenly I was really wanting to make one but this time, after gathering my supplies and setting up a space, I realized that the muse was calling me to accomplish a series of journals. In part this project grew from the abundance of cardboard I had as I just acquired from a toaster I just bought as well as the need for a new traveling journal for myself. Upon opening the box of the toaster I knew that *this* cardboard was destined to be some very special journals! As I began the project it became clear to me that making a few journals wasn't going to completely satisfy my creative urge. I realized that in order to satiate my creative tendencies I had to make the project even bigger and better by making them into journal kits.


I started out by making six journals but knew that I needed to practice and test ideas out on at least one of them. So I ended up really stressing the first journal out and decided I should keep it for my own. I had started out wanting to make myself a journal after all, right? And since I ended up putting it together and tearing apart a few times it was only fair not to pass it off to someone else. I did it this way because I wanted to see just how much the little journals could hold, still look nice, be relatively easy to construct, be portable, lightweight and filled with interesting items for inspiration.


I became aware that it would be a really good idea for me to get a feeling for using a journal kit that I put together. I can asses it strengths and weaknesses and look for ways to improve it. And that's exactly what I did! Nearly two weeks in the making and it's taken me a lot of trial and error to get these perfected and looking sharp! I'm glad that I was able to work through the difficulties and get the journals to be exactly what I wanted. After I got through the experimental stages I was able to apply what I had learned to the other five journals. I had a great time making these and I do believe that I will be doing it again!


the painting stages the covers went through...


I used acrylic paint for the covers, spines and the Washi tapes. Then I filled the journal with mixed media papers for decorating and newsprint for note taking or quick sketches. I included a pocket and filled it with a lot of inspiration like decorative scrap booking papers, paper doily's, manila tags and a few other things. Then a couple of days later I decided there weren't enough elements in the pocket so I added even more! I'm totally going to brag now: I also added a bunch of stickers made from some super cute, hand carved stamp, images that I made! Now the pocket is rather bulky but I feel it holds a lot of potential for a variety of creative expression.


close up of one of the covers


Originally I started out with enough space for storing three Washi tapes but through experimenting I ended up redesigning the holder to make more room and now it holds at least five! I'm totally bragging here again because one of the tapes feature my (BB) hand carved arrow stamp image and the other images are (SB) store bought or from (SU) Stampin' Up!


Washi Tapes
L-R: neon pink with SU swirls; light blue with SU snowmen
purple and pink with SB butterfly & flowers; red & orange
with BB arrow stamp; blue and green with SB stamp
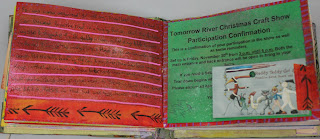
and YES! that's a piece of home made Washi tape holding the end page in place...


This kit consists of a variety of supplies, colors and cheer to help inspire you to document those wonderful memories of your favorite vacation or day at the park and revisit them often. This kit will inspire you and help spark your creative muse. l know it will be just what you need to help you record a special day and to take with you on your next outing. Whether you like pencil, pen, pastels, water coloring, acrylic paint or  to mixed them all together there is plenty of space to experiment and create small works of art.


a look at the inside pages & folder filled with goodies
the button and string closure keep it all in place
you can decorate every surface!


~ ~ ~ ~ ~
Included in each kit:

6" x 5" hand painted / hand bound journal, with button & string closure and 2 metal corners on front

12 pages (24 counting front/back) of mixed media paper
4 pages (8 counting front/back) newsprint
5 pieces of hand made Washi tape 12" - 17"

Tag board pocket filled with:
1 piece, folded, tracing paper
1 small piece of map
1 small piece of magazine page
2 small pieces decorative paper napkins
10 small pieces decorative paper
1 small, two color, picture of Neptune
2, folded, paper doilies,
a variety of hand stamped stickers, nearly all are BB hand carved images
5  manila tags, hole punched
3 mania tags
12 reinforcements
3 TICKET / KEEP THIS COUPON, faded blue
1 piece, blue card stock, decorated with my hand carved doily stamp / embossed in white
two pieces sticky back tape 1 embossed with the word BELIEVE and 1 with the word LOVE
and MORE!!!!
~~~~~
Tag board page with 12" - 17" hand made Washi tapes:

1 purple & pink with butterflies & flowers
1 red, orange, yellow with arrows (my hand carved stamp)
1 blue & green with script
1 light blue with snowmen
1 neon pink with swirl
~ ~ ~ ~ ~

A brief suggestion for additional supplies you may want to use in your new journal: gesso, book pages, newspaper, watercolors, gouache, acrylics, sand paper, scissors, photos, gel pens, distress ink , stapler, glue, glitter, spray inks, rub-ons, lace, ribbon, a brayer, stencils....

~ ~ ~ ~ ~


a look at one of the journals...


~ ~ ~ ~ ~
The holidays are upon us and I thought it would be super fun to do a giveaway of one of these sweet journal kits! Wouldn't you agree? If you think you'd enjoy this mixed media journal kit or know some one who would and would like to join my December Giveaway there are FOUR awesome ways to enter and please note: this giveaway is open to everyone everywhere but you should be over 18 because if you win I'll need your address to ship it out to you. Also if you're not in the USA the package may not arrive before Christmas, as you may well know. I also invite you to tell a friend, subscribe to my blog and to like my Facebook Fan Page to get sneak peaks, interesting links and more!
~ ~ ~ ~ ~

Here's how to enter:

First lease leave me a comment with your name and a valid email address and tell me what your favorite winter sport is and why! (must be a real sport, please) 

Second fulfill the first requirement of leaving a comment. Then re-blog OR tweet OR post on Facebook OR somewhere else about this giveaway and leave me a link where you put it.

Third fulfill the first and second requirements in addition to making a purchase at my Etsy shop and leave me a comment with your Etsy purchasing name and as a Thank You I'll give you a 30% refund!

Fourth fulfill the first and second requirements for this contest and make a purchase at my either my Zazzle shop or my Society6 shop

~~~~~
Giveaway starts December 7th and will end December 14th... winner will be announced here and on my Facebook Fanpage. I will also contact the winner by email. If all goes to plan and you're in the USA you should have your journal before Christmas! If I don't hear from you by December 21, 2012 I will select another winner.
~~~~~

Happy Holidays & Best of luck on the contest!
~Stephie
 

********************************************************
Winter is one of my favorite times of year and I thought you may all be wondering what my favorites are... Well I thought I'd start by telling you all that my favorite recreational winter sports to participate in are dog mushing, cross country skiing, snow shoeing and camping. Yes, I said camping - the kind you do in tents - it's really fun!  I never said it wasn't cold because it totally is but it is really rewarding.

My favorite winter sport to watch is biathlon, where women ski & shoot targets - these are some of the most impressive athletes I've ever seen. I was hesitant at first to watch but it really caught my attention.

Thank you to all who entered this giveaway and shared your favorite winter sports with me I like hearing about you! I'm happy you could all join in the giveaway fun. I counted five entries so I put 5 into Random.org
and Prerna Poojara has won the giveaway! CONGRATULATIONS!  I will attempt to get a hold of you by email. As you did not leave me an email address I will use the one attached to your blogging account. You have until December 21st to get back to me if I do not hear from you I will choose another winner.


*******************************************************


*******************************************************

I've been on an art journaling journey and
here are a few pages I've made in my
Here to There journal kit. I've tried to
use as many of the elements I can
that come with the kit as well as other
ephemera from different events I've been to.


 This one is not finished it's just a jumping off point for inspiration...


 This is a two page spread there's some text; a postcard and a tip-in.


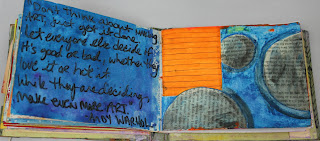
This is a two page spread with a quote and room for more....


 This is a two page spread with a tip-in envelope....
I made the envelope so I could put our concert tickets in it... 


Here's a two page spread dedicated to Cloud Atlas
and I just stapled in my movie ticket.

This is a one page spread I just started doodling
then I added color and text...

Saturday, November 10, 2012

Gathering Up Bits of the World Giveaway

Did you know?
Susie at Gathering Up Bits of the World is doing a pretty nice giveaway for Journal It by Jenny Doh. The book has mini art lessons, tips, techniques and insights by a variety of artists. Susie is also adding in a journal she made and starter packet of goodies to start your own art journal with. How cool is that! What can I say, I love giveaways! Inspired by all the great giveaways I've been seeing lately I think I will be doing one soon, too. Be sure to join in the fun! Winners will be announced in a week on Friday.

Good luck to all who enter,
Stephie

Friday, November 9, 2012

Riverfront Arts Center, Fine Art Gift Gallery

November 2012


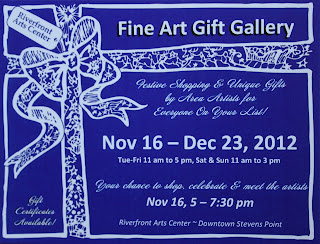
Every November the Riverfront Arts Center they hold their Fine Art Gift Gallery. The Riverfront Art Center is located at 1200 Crosby Ave., Stevens Point, WI and this will be their 14th year annual show. There will be artists from all over WI who have submitted work for the holiday season. This is a great opportunity to support local Wisconsin artists and find some unique gifts to give this year. If you're in the area please drop in you may find something unexpected if you do. They also offer a "men only" shopping night. That's on Thursday, December 13 from 4-6 pm and there will be staff on hand to help choose & wrap gift selections.

Here's a peek at the blank cards I've put into this show.


Enjoy the holidays!
Stephie


Wednesday, October 31, 2012

Fabulous Faces an e-course review

OCTOBER 2012


Last month I reviewed Tamera LaPorte's Art, Heart and Healing e-course and this month I wanted to talk about the next course I took by Tam called Fabulous Faces.


Fabulous Faces
This is a great class for beginners. In short this e-course is focused on drawing three styles of female faces. We use a ruler, pencil, eraser, paper, color pencils and acrylics to create a front facing portrait, a three quarter portrait and a profile. There are many hours of footage to watch and learn from as well as several PDF's to download. I've always been apprehensive about portraiture and wasn't sure where to start. But I really wanted to challenge myself and get past this fear.


What do you do when you're afraid to fail...
Would I really hold myself back because I was afraid to fail at drawing a face? Seriously? Ummm... NO! When the question is stated like that it seems silly. Maybe faces wouldn't be my thing. I could live with that. But I had to find out if I could draw one and if I could draw one successfully what then? That's the real question I should be asking.


Baby Steps
Over this year I've come to learn that what looks like success is really a moment preceded by a great deal of practice that if seen independent of the success could be categorized as a string of failures. As long as I am developing my skills and ultimately my own style, because that's really the goal, then each 'failure' is a success in itself. Maybe not frame worthy but a triumph. First I had to take those baby steps towards taking my art seriously. So what if I did make art that was terrible. No one is looking. I never had to share those with anyone, right? I could throw them out or paint over them. I could save them and look back and the stepping stones I took to where I wanted to be. I even imagine that some day I will be looking back on them and wonder if I could draw such quirky pictures again. It was about time that I started facing my fear of creating a portrait one feature at a time.


More than just a drawing lesson
I suppose I could have gotten a book on how to draw, but for me I needed more than that. Since I'd taken Tam's free course and knew that I liked her style and I felt that I could really learn from her. I knew that e-courses were going to work for me. Tam explains what she is doing and why she is doing it. She shows you her work, step by step and she even make mistakes and teaches you how to fix them. I like how she embraces serendipitous moments and teaches how to use them as part of the work. The website has a forum for showing your work, getting / giving support and feedback. From what others were sharing I'd say the course really helped many students of all artistic backgrounds gain the skills and confidence they needed to create successful portraits too.


Illustrate 
The style Tam teaches is more illustrator like and not life like but that is great for what I want to create. Being able to add an expressive character to my work would give me more options. But first I had to know if I was able to create a portrait. Tam really encourages the new artist to try the techniques she shows for successful results. I had to keep telling myself that I came to this course with the desire to know if I was able to learn to draw a face. I was determined to create at least one successful portrait. Because having this skill is worth something to me, not just validation but it culminates in a rounding out of my artistic abilities. Improving my skills is what I've been working on all year.


Fab Faces
When I decided to take the course I bought a set of drawing pencils and eraser to help encourage me along. I must say I did a fair amount of erasing. The first time I decided to erase a whole face was super scary. But I had the material, the understanding, skill and experience to make that bold move. Starting again was not nearly as daunting. If I had to figure it out on my own with a book those nagging thoughts that say 'give up' when things were looking bad may have overwhelmed me and won. But, with Tam's clear and easy to understand instructions I was able to see it through to the end. Her videos encourage you and help you feel like it's natural to make mistakes and gives you the tools to get back on track. You will learn the skills you need to to create a piece that you can be proud of and want to show off. Which was exactly what I needed because I was tired of avoiding portraits. I discovered that I rather liked portraits more than I expected to and I was more capable than I thought. Here's what I created in this e-course...


~ ~ ~ ~ ~
Firstly we were to just go for it and create a portrait.
Here's mine... Not too bad. I kind of like the
heart shape of her face and her cheek bones.


~ ~ ~ ~ ~
This is my first attempt at the Three Quarter Portrait.
I can see where I struggled but I choose to  focus on what
I'm happy with and that is the proportions and shading.


 ~ ~ ~ ~ ~
This is my first attempt at a Profile Portrait.
It wasn't any harder than the other two lessons.
But I ended up copying the face and changing the
style of hair. There is nothing wrong with copying
a lesson. It's part of learning how to do something.
But at some point you have to venture out on your
own and show yourself what you can do. This one
for me was the toughest of the three lessons.


 ~ ~ ~ ~ ~
This is my first attempt at a Front Facing Portrait.
I chose to give my girl a braid rather than what Tam was
instructing. Part of becoming an artist is taking what 
you learn and applying it to what you create.
I'm super happy with this one, especially the shading.


 ~ ~ ~ ~ ~
Lastly Tam posted an optional challenge to create
a monochromatic portrait. That is when you use only 
one color for the piece. She did allow tints and shades 
of that color along with white and black. I chose to 
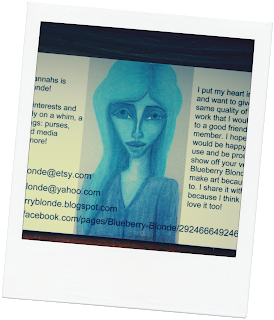
do a self portrait in blues. It's not quite me but it is me. 
I'm quite pleased with the result and had fun making it.


 ~ ~ ~ ~ ~
I decided that I did like the self portrait in blues so I went
to Vista Print and made some business cards...

~ ~ ~


I'd say that I totally recommend this course to anyone who wants to create a portrait for the first time or to brush up on your already existing portrait skills if you feel you're out of practice. I had an art teacher who once told me to take as many art classes as possible with as many different teachers as possible. You can learn and learn from one teacher yes, but you can learn more if you expand on what you already know by taking in lessons from diversifying your instructors. Getting stuck creating in one way is not going to help you expand your skill set but learning from what others have to offer will help you develop as an artist. I know that at some point I will move on from Tam but for now I feel she is offering me exactly what I need to get me up on my feet and moving towards the artist I will someday become. I have a few more classes with her that I will be covering here on my blog so please stay tuned. I hope you will be inspired to take some of her classes yourself. Here's a link to her website Willowing.


Happy creating,
Stephie

Friday, September 28, 2012

Art, Heart and Healing an e-course Review


It's September and this month I'll be talking a bit about Tam LaPorte's Art, Heart and Healing E-course.


A few years ago I started to look into on-line art classes in part because the nearest college that teaches art is about 3 hours away and I don't really want to go back to college. I've taken on-line classes before so I know the method works for me. I began by looking on YouTube for free artsy classes and after a short while discovered "art journaling" which I had never heard of before. They seemed to be a whirlwind of mixed media pieces by incorporating ephemera, painting, stamping & journaling all in one small space. I must say that at the time I didn't make scrap books or keep a journal so I was quickly overwhelmed yet strangely in awe of the concept. Art Journaling didn't quite hit the spot for me - what I really wanted to do was paint.


Some of the videos I viewed were by Tamera LaPorte, user name Willowing, and although they were mixed media works they weren't crammed into a small journal. I watched a few videos and noticed she incorporates text and that's a bit like journaling but I kept thinking that the works could stand on their own. To me the text seemed optional yet, also seemed to support the art and put the characters expressions into context. I was intrigued.


The more I thought about it the more I realized I wasn't against art journaling, adding text into my art or adding drawings into a journal entry. I'd just never been there or tried that on such a scale, so it was new to me. I needed more time for the idea to go to seed in my mind. As I searched YouTube for art videos it seemed that the art journaling was the style that I kept discovering appealed to me most because of the variety of topics, the mixed media elements and the possibility it presented.


What set Tam's art apart from the rest were her videos. They were short, shot with a tripod so they were steady and often times fast-forwarded so you could see the progression quickly. I also liked her friendliness as well as her art style - her characters were realistic yet not so overwhelmingly real that they seemed photographic, they were somewhere in between and seemed attainable to me. I began to feel inspired to create but I ended up putting it on the back burner for a couple more years.


When I decided to paint at the beginning of this year I kind of went through some of the same steps of looking to YouTube and rediscovering what's new in painting, mixed media, art journaling and I found Tam again. I had actually had forgotten about all of it but I was quickly absorbing the creativity because now I had time to devote to pursuing painting more seriously than I had a few years ago.


I discovered that Tam had a whole bunch of e-courses running and was successfully teaching her style of art to thousands of people just like me! How could I forget that!? Anyways, when I realized she had this free course Art, Heart and Healing I jumped at the opportunity to try it out. In part because it was free, yes, but also because I liked some of her other courses and before deciding to pay for them them I wanted to know if I liked her style of teaching and if could I really learn from her methods.


Going into the self-paced, free e-course I had no idea what it would be like or how much I would get out of it. I thought it would be a few quick videos of her painting in fast forward like on YouTube and maybe a bit about what she uses to create her art. And oh boy I was wrong! There are an unbelievable four weeks of course work with at least two hours worth of video with each lesson. She tells you what she uses, how to use it and there are several downloadable PDF's too. Tam really went all out to get the viewer involved with the lessons, techniques and provide support of any kind if you need it..... forever.


Not only does she place creativity within your reach she gives you the tools you need to be successful at attaining a creative and deeply personal work of art even if you've never drawn or painted a day in your life. Even though I was afraid to dive into uncharted territories of art and the heart I really had a good experience that was well worth the time and effort on my part as well as hers. My fears quickly dissipated as Tam has a lovely soothing style, there's a lot of simple techniques given and her videos fluctuate between a regular conversational pace and fast forwarding when she's already covered a technique so you don't feel like she's wasting your time. The videos are free and downloadable so you can review a technique if necessary.


Although she edits her videos she'll say something like "Oh look, I've made a mistake here but I'm not editing it out because I want you to see how I fix it." Which I found quite helpful. When the lessons focus on healing she shares some of her own life with you in order to show you how to take some steps to move past an old hurt and she says that all of the lessons, techniques and healing elements are completely optional and if some things are too painful then simply focus on the art techniques. She will suggest you copy her style if you like while she encourages you to try things on your own and develop your own style when you're ready.

A brief word about the Willowing site - Tam has created an online presence and art community of support for all ages, genders and geographical locations. Everyone is welcome from all walks of life and all artistic levels. The lessons are all taught in English and she encourages us, when using text in our work, to use whichever language we're most comfortable with. There are different forums on the site for sharing art, finding support and so much more! It can be overwhelming at times because there is a lot of activity. Just remember that if or when you're ready to share you can and if sharing isn't your thing then that's fine too. The forums are simply there if you want to participate or just observe. What's important is you get what you need from what is offered.


I don't spend much time in the forums myself but I know that if I do decide to share my work for a class that I am sharing in a safe place where no one can spoil my fun, as everyone is encouraged to be supportive of each other. It seems to be that there is great support and encouragements all around. If I want a critique there's a specific forum for that. I've never participated in a critique because I feel as long as I'm satisfied with my art then why would I need one? I think I'd use it if I was really stuck on a piece and need guidance but luckily I've been pretty happy with what I've created.

And that's kind of what it's all about... creating art you love! There's art class and learning the craft and learning expression through the craft. When you make art that you love that is uniquely yours and someone else loves it too then you've been successful.

I can not say enough good things about Tam, Willowing and this free e-course. I liked it so much I signed up for the other classes I was interested in but I'll talk about some other time. For this course I chose to only create one piece of art and it's quite unlike anything I've made before because I followed Tam's style. I made it in my new Molskine art journal... and while I am not a prolific art journal-er and don't think I ever will be I've come to realize that painting on any surface is painting and that it's the process of creating that makes me happy...


I hope you enjoyed reading this review and find it helpful. Maybe you would like to try the Art, Heart and Healing e-course yourself.

Happy creating,
Stephie                                                                     

Sunday, August 12, 2012

Painting My Story


AUGUST

Earlier this year I finished an online painting course called Paint Your Story (PYS) with Mindy Murphy Lacefied. PYS is my second painting e-course this year in my quest to bring painting back into my life. Let me tell you that it was a great investment! This class was designed to challenge us to let go, be messy and rule free in order to create a colorful random design for our background then to add a a character on top! Sounds easy right?  

Messy, Messy
As a child it's fun to get messy and scribble out a work of art, if not a masterpiece, within a short while. Not only that but how-ever it looked we were proud of it, willing to share it, and give it away. But as an adult it's difficult to embrace 'mistakes' and accept imperfect as perfectly fineMaking art that has the carefree-messiness-on-purpose look is actually a huge challenge and so is getting messy...


Let Go...
PYS helped me along to feel a bit more comfortable with getting messy and gain confidence in saying "it's ugly AND I love it!" I'm glad I took this class because I learned a lot of things I would have not figure out on my own. Just look at these pieces I made, using chalks, within the first couple weeks of taking PYS! To me they look like a child has made them and that's the point! So, this is not a bad start.


.
.
.

Finding a voice
It's been stressful for me to want to paint and not be able to for fear of making something that isn't beautiful. I needed to learn to let go of the idea of perfect and embrace the reality of what I am creating. Thank goodness Mindy is teaching us that the messier the better and the uglier it is the more lovable it becomes! I remember there was a time that I made all kinds of free flowing art without self judgement or worrying about what someone else thinks. I was wishing I had some of my earlier art so I can see what I was up to but sadly I don't. I do have art from other youngsters somewhere though.... but what I really wanted to do is to tap into that creative momentum I once had again. Now what I had to do is to find my 7 year old self...... =)

And there she is! For the PYS class I found a photo of my 7 year old self in order to reconnect with her and to ask her to be my Muse and work with me to create carefree, fun, experimental, messy art, embrace all the colors I wanted to use no matter if they went together or not and to scribble marks on a page if I wanted. Using my left hand or my right hand - anything goes! Flowing with all of this on my journey to develop my own unique creative voice. 
.
.
.

Things to remember
I have to remember that if I truly don't like something it can easily be painted over, papered over or torn up and used in another painting. PYS teaches that there are no mistakes in experimenting with color, line and form. The story of the painting is told through the layers. The process of creating is as important as the outcome. The point is to express ourselves not to impress others. Taking photos along the way can be helpful. Sometimes the results are impressive sometimes they're scary. It's difficult to know what is waiting to be expressed... Continuing to paint through difficult times, emotions or struggles can help you get into a meditative state of mind and the art just happens intentional or not... and that's pretty fun!
.
.
.

Doodle!
We were encouraged to practice doodling! Here's one doodle page I did, early on in the course, in color markers on top of an acrylic paint and oil pastel background. I'm trying to get messy but I'm really reserved and restrained so I'll need to keep at it to get to that place of pure messy bliss but this is a great start. I really love the colors and the elements... 
.
.
.
When I learned about PYS I thought that it really was a great idea for me to take a class that would encourage me to rediscover the joy of creating by creating. The exercises that Mindy provided helped me begin to bridge the gap to my creative right brain and reconnect with my inner child, for it was she, who had fun creating simply to feel a crayon in her hand and be happy to make marks, doodles and scribbles. And it will be that version of me who I wish to reconnect with and join hands in making fun art! Can't believe I ever forgot to keep that part of me going but I did and now that I'm getting back in touch with my creative Muse I'm hoping to keep in tune with her.

The practice of art doesn't have to make sense and learning not to judge myself for making a practice page that was cluttered, crowded and messy was and still is difficult for me but I'm glad I made the effort! It's like doing stretches before exercising to help loosen muscles...doodling helps loosen up the creative side.

Mark making: left page done with my left hand & the right page done with my right hand.
Not simultaneously... haha... although that would be awesome...
.
.
.
Playing with weird head shapes, filling in features and practicing with color & shading...
.
.
.
15 minute challenge
One challenge was to select one head shape from our weird head shape sketches and quickly paint a character using it, spending no more than 15 minutes on it. The key was to work quickly and not over-think it. I chose to do this challenge in watercolors. 

When I look at it I see that the less time spent on a small painting like this the better! It turned out to be a more truly right brained work of art. It's like a rough sketch in color, the over-all essence of a girl holding a bird is there and she's a wonderful character. Had I set out to paint her 'just so' without a time limit she'd have been quite different. Maybe I'll re-do this challenge a few more times over the year just to see how my painting skills and style are developing. Won't that be fun!

Setting a time limit may be one way I can help myself from not over thinking or over working a painting. I look at her now and I know this painting is not perfect and could list all the flaws but I want to listen to my 7 year old self and she say's "it's done!" "it's perfect!" I created what needed creating at that moment and now I'm moving on!
.
.
.
A few more paintings...
I used what skills and confidence I gained through the PYS class and made a few more pictures using Mindy's techniques.

Mr. Moonlight

.
.
.

Mon Petite Chou 

.
.
.

Bear

.
.
.
Cupcake Dreams
This one, Cupcake Dream, is one of my favorite mixed media collages that I've made to date! 
The original of this has been SOLD...  And the first one, Mr.Moonlight, was also SOLD at an art show I participated in this summer at the Red Star Mill. From what the buyer told me it was going to be hung in a nursery for a little boy! How cute is that?  =)
.
.
.

I hope...
I'm hoping to be posting all of the original pictures you've seen in this blog post, with the exception of Mr. Moonlight & Cupcake Dream which have been sold, for sale to my Etsy shop sometime before the end of the year.... =)

I'd also like to be able to offer prints of all of these, so I'm looking into my options, and hope to figure this all out before the year is up... Anyone with tips or suggestions please contact me! Right now I do have a bunch of my art on some products at Zazzle... I guess I could always go the route of selling one of a kind paintings without prints... I'll have a think on it.

Enjoy the sunshine,
Stephie

Sunday, April 29, 2012

Aurora Leaves the City Behind, a painting in stages

Painting on the brain...
I've been working on my painting skills over these past few weeks. I struggle though. The struggle is not just to find time to paint but to allow myself have the time and space to paint. Not sure what your take on painting is so I'll just speak to what it is for me, at this time. I like painting and I'd like painting to be one of my regular hobbies. I know that it isn't just a hobby but a skill that needs time, patience and lots of practice.

Express...
A painting can be an expression of an idea, a place real or imagined, a dream or be completely random and spontaneous. I usually creatively express myself in other ways like sewing or baking. Maybe it's because I prefer making something that I've had the most consistent successful results with. I should persist with painting because in time it too will begin to have successful outcomes...

Learning to relearn how to paint...
I've taken drawing, painting and watercolor classes years ago but I feel like I've forgotten much of what I once learned mostly because I didn't regularly paint. I only occasionally painted. So this year my New Years Resolution, a first for me, was to paint more. I don't make New Year's Resolutions so I thought if I do make one it will have to be a resolution I'd actually enjoy doing. A resolution that would bring back something I would like to welcome into my lifestyle; something that would enhance my life as an artist. In deciding to paint more I needed to find at least one on line painting class. And this painting (below) is from the first class I took this year by Juliette Crane called How to Paint a Girl.

Take a break...
One thing I'm beginning to understand is that I'm just like any other person who struggles with creating. There are times of success, times of frustration and sometimes downright failures. Some days I have a clear direction for what I'm creating. Other days I'm totally lost and muddling through. I'm learning to identify and accept these cycles as part of the process. It's difficult to KBO (Keep Buggering On) so when things don't work out I'm learning what works for me... taking a few minutes, hours or days away from a painting can be helpful. Working on more than one project at a time can be helpful. Get involved in something else like gardening can help to change my perspective. Taking the opportunity to get past a mental block can be a great way to help me work through these difficulties so I can get to that next level of creative freedom and expression. The more time I work on and work through these moments the more I will begin to have successful outcomes; just like I do with sewing and baking! Truth be told even though I do have a lot of experience baking and sewing there are still times they don't turn out no matter what... so yeah all part of the process!


Using an existing skill for a new purpose!
I love taking photos! One method I've begun implementing is to take photographs of my painting at different stages. Using photos in combination with painting is a new tool for me! I'm enjoying it because I can see how my painting evolves. I like seeing the progression from an idea to where I struggled and it's cool to see where I discovered elements that helped my piece become successful. It is kind of hard to see one idea get covered up by another but by taking photographs through the stages I can always look what I've lost and use the idea for another painting in the future so that's kind of cool. When a painting seems like it's not going anywhere or like I'm not having fun anymore taking a color I like and painting in a playful way helps. These photos are a great way to take a step back from the work. Seeing how the colors are balanced and work together, how the elements are balanced is important to see where the piece is going and what possibilities are waiting to be discovered! Photographing my paintings seems an especially helpful tool when I'm struggling.


Here's the first idea I had for this painting, a fairy girl in a garden... So I put a bunch of paint and ephemera on the canvas and started to carve out shapes but when I stepped back I wasn't liking the uneven wings, her hair or the ephemera after all... So I snapped a photo. Then I took a color that I do like and painted over all the stuff I didn't like. I kept at it and putting other colors on the canvas overlapping them and dripping paint all over and scuffling in some new shapes... 


As you can see a lot has happened between that first idea and this next photo. I applied many layers of color I turned the painting this way and that so I'd get interesting drips. I added trees and that big grey cloud. I added more detail to her face and dress. And with some time and energy and perseverance the whole thing was a lot more appealing. And although it is quite different than it began I really liked where it was going.


This is the finished painting! I really worked hard to get this girl to emerge. It was hard but I spent several days painting her, the path she's on, the trees, the shading, the cloud, the cityscape and the snow in order to get them to look as they do. And I believe the work I put in payed off! This is one of my more successful paintings and I couldn't be more pleased. It may not seem like much but from three simple photos it's easy to see where I started and how far the work has come. 


Change is good!
I ended up changing the initial theme but really this snow scene suits me better. I really love the blues and greens together. Her dress is such a cheerful green and the belt, which is really a bit of ribbon, is so sweet! To me there's something very magical about snow and shadows. The city and the cloud is a bit gloomy but it's behind her and with each step into the forest she's leaving the city behind. And what a coincidence! I moved from the city to the country! And I'm much happier for it. I know I can always go back to the city for a visit. Maybe someday I could even live in a city again but for now being in the country and seeing the stars and smelling the fresh air is so completely magical that it rejuvenates my soul everyday!

Thanks for stopping by. Please feel free to leave me questions, comments & feedback about my painting, Aurora Leaves the City Behind.

Enjoying the sunshine,
Stephie

Wednesday, April 11, 2012

CUPCAKE PIN GIVEAWAY CONTEST IS NOW CLOSED

Congratulations to the two winners Dorothy and Amber! Please email me at mrshannahs at gmail dot com with your address and I will send you your selection of cupcake pins. And how awesome is it that you're the  only two contestants?! Lucky you! I'll send each of you two pins! Please choose one more cute cupcake pin for me to send! 

~
~ ~
~ ~ ~ ~ ~ ~ 
~ ~ ~ ~ ~ ~ ~ ~ ~
Thanks to all 100 fans on my 
FB fan page I am now having an
awesome cupcake pin giveaway!
This contest is open to everyone!
There will be four cupcake pins
given away to four winners! Yay!


100 fans is a great milestone to celebrate and I'm doing just that with a giveaway! I've been smitten with these cupcake pins that I hand stitched, hand embroidered and decorated! They're so cute, wouldn't you agree? I get lots of compliments on my pink one that I wear on my jacket. I've been hoping to have this giveaway for my fans but I'm quite over joyed and have decided it's open to everyone! Yay! Of course you're all invited to follow my blog and my FB fanpage to keep up with me, my projects, get coupon codes and more! 

This contest will be open until Thursday April 19th (one week) and I will announce the four winners here on my blog soon after! 

It is simple to enter! One entry per person, please. Here's how: head over to my Etsy Shop then come back here and tell me in the comments below what your favorite Blueberry Blonde item is. I'd also like to know what your favorite thing about spring is! Also click on the cupcake pin photo below so you can see them better - they're all numbered - so you can let me know which cupcake pin is your favorite! 

Here's an example of a what valid contest entry includes:
From the Blueberry Blonde Etsy shop my favorite item is the Verdant Hectares bag. My favorite thing about spring is hearing all the song birds again! My favorite cupcake pin is number 15!


Best of luck to all who enter!
Stephie

Tuesday, April 3, 2012

Did you know?

Oh, hi! Thanks for stopping by! You may already know or have noticed that I'm not a daily blogger. Daily blogging isn't for everyone and that's ok. Balancing all there is in life with writing a daily blog isn't for everyone. It certainly isn't for me. That's why I set a personal goal of writing a monthly blog post or tutorial in an effort to have a fun blog to share things I'm interested in with family & friends while be realistic about what I actually have time for.

When I started this blog I knew I wanted to have tutorials somehow separate from my main blog so they could be easily found and searched. But being new to blogging and not being sure how to set it all up I ended up with two blogs. Ha-ha....

I get lots of visits to my main blog here... but not too many visitors to my my tutorial section but I would like to encourage you to have a look as there are some fun and interesting DIY tutorials! If you haven't seen them yet, then hopefully you'll have a chance to take a look. Here are three that I've written up thus far in 2012:


Enjoying the sunshine,
Stephie

PS: I'm just a few FB fans away from holding a cupcake pin giveaway! =)

Tuesday, February 28, 2012

A Very Twinkie blog post

One of my favorite fiber artists Twinkie Chan is having a great giveaway over at I Hate Michael Shirley check it out!
http://ihatemichaelshirley.com/post/18065587760/february-giveaway-twinkie-chan

Tuesday, February 14, 2012

Happy Valentines Day!

Valentine's Day is one of my favorite holidays! For me it is more than a day for me and my husband to indulge in romance, flowers, jewelry and sensual foods. I see it as great opportunity to tell my family & friends I love them too! Here's what I have planned: I've got a cute heart bunting that I made and put up next to pink tulips and paper whites and I'm planning on making a yummy steak and heart shape potatoes for dinner & I know Bill will love that! A can't forget a decadent dessert! I'm making heart shaped Boston cream cakes for us to enjoy together. Of course I'll  be wearing the new earrings my husband bought me! He also got me some cherry jam, cherry maple syrup and a jar of cherries when he was in Sturgeon Bay / Door County, WI yesterday. I do hope you have some wonderful plans for today too.
                                                                          
~ ~ ~ ~ ~
Nothing says I love you more than a hand made Valentine! And here's mine! It's painting of me & my Valentine! Titled 'Be My Valentine'


~ ~ ~ ~ ~
Made with acrylic paint, book pages, a variety of papers, liquid gold leafing, red flocking & Collage Pauge.\
~ ~ ~ ~ ~
UPDATE: I thought you'd like to see a couple of pics of some the yummy food we ate! =)

Baked Potato Hearts with Piedmont Steak & Salad


Happy Valentines Day,
Stephie

Tuesday, February 7, 2012

Topiary Girl

Hello! I wanted to tell you about this on-line painting class I'm taking & where it's taking me!!! 

In early January I signed up to take a class by Juliette Crane called How to Paint a Girl. It's not my first on-line class so I was not terribly nervous about how on-line classes work and whether they'd work for me. I was only a little bit nervous but really I was more excited to get over my fears: getting past muddy colors, sharing my art work with other people & painting faces!  It's been two weeks and already I'm making decent progress in these areas. Check out Juliett's sneak peek of How to Paint a Girl & an Owl!


~ ~ ~ ~ ~
Here's my painting
Topiary Girl
~ ~ ~ ~ ~

I dunno if you can you tell but I really like orange & green together!  Here is one of my 'girls' and I don't know about you but my favorite part of the girl is the skirt! I really love polka dots!

Honestly it took me a while - I worked on and off for days - to get this Topiary Girl accomplished.... but before I took this class I would have been discouraged when I got muddy effects from over painting. I would have either set it aside or worse yet thrown it out. Good thing Juliette talked some sense into me because I've learned how to avoid getting muddy effects. And if I do, and I did get them, I learned to walk away , let it dry, then apply a new color that I do like and continue on. Sometimes if I don't want to wait for the paint to dry on it's own I'll get the craft hair dryer out and speed things along.... my craft hair dryer is really just a travel sized hair dryer... ;-)

For my painting Topiary Girl  not only did I have to over come muddy colors but another more alarming obstacle for me was that I didn't know that I had selected a page with Crackle Glaze on it. I thought it was simply a sparse background of color. I think it was over a year ago that I put that page away. More than enough time to forget that it had Crackle Glaze on it. So, once I started painting everything got crackled needless to say I had to walk away.

I knew that the one thing I didn't want was a girl with cracked skin, or a crackled background. But, maybe I'll use that effect in the future but for now I had to work hard to fix it up. And yes it got muddy and a couple of times and when I went to blot at the paint it horrifically peeled off to the bare paper in some spots - this was unexpected and kinda ruined a few things I was liking. =(

I walked away though and let it dry. I knew I had to keep at it. I'm guessing that's how crackle acts when you water log it and poke at it too much? LOL! But eventually the crackle either came off or got buried under lots of layers of paint and I painted new things that I liked and forgot about the stuff I lost. The only place the crackle looked nice was on the skirt.

I think in two weeks I have come a long way, not just in dealing with my fears of painting faces and sharing my art with other people but in managing to make a difficult painting work by persevering and seeing it through to something that is successful and cute. =D

 ~ ~ ~ ~ ~
Here's what I used: acrylic paint, chalk, origami paper for the dress top, security envelope for the belt & an atom from scrap booking paper for the belt buckle & applied a gem with mod podge. A variety of brushes including: round, flat, sponge, and a stencil brush loaded with 6 different colors for the rounded effect on the topiary I think it really made the topiary's leaves look great!
 ~ ~ ~ ~ ~

I'll make her available at my Etsy shop soon but in the meantime you can let me know what you think!

Happy Days,
Stephie