
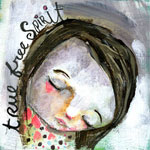
"Tell Your Story"
I will be posting a journal page a day! While I'm taking an online class, through Red Velvet Art (RVA), called Tell Your Story. (registration is closed) It is a 6 week class so, I'll be posting one page a day to my blog for the six weeks.
This will be a visual journey of self reflection via mixed media collage and a personal challenge...
~ ~ ~ ~ ~ ~ ~ ~ ~ ~ ~ ~ ~ ~ ~ ~ ~ ~ ~ ~
~ ~ ~ ~ ~ ~ ~ ~ ~ ~ ~ ~ ~ ~ ~ ~ ~ ~ ~ ~

~ ~ ~ ~ ~ ~ ~ ~ ~ ~ ~ ~ ~ ~ ~ ~ ~ ~ ~ ~

~ ~ ~ ~ ~ ~ ~ ~ ~ ~ ~ ~ ~ ~ ~ ~ ~ ~ ~ ~
~ ~ ~ ~ ~Saturday! Today I made a mini journal that (hopefully) fits inside a handbag. Hence the term "handbag journal". I only have two photos to share...
I used lots of different sizes and types of paper. I also hand stamped each page with (mostly) hand carved stamps. Added a Blueberry Blonde noggin sticker and mailed it to my BFF Rachel! Shhh... it's a surprise!
~ ~ ~ ~ ~
What I did:
I used a tiny gift bag for the cover and lined it with colorful polka-dot scrap book paper.
I removed the cord handles and added an extra hole so there are three across the top instead of two (on both the front & back).
There are lots and lots of papers for the pages with of all colors, sizes and designs. (apple, strawberry, grid, white lined, brown lined, yellow lined & black...)
I made two envelopes that fit inside, one for each inner cover, from legal pad paper. I took a bit of ribbon and glued the ends of it under the side edges of the envelopes. So the ribbon goes across the envelope in order to secure the flap (you can kind of see it in the photo). To secure the flap you simply tuck the it under the ribbon. I also added three hole punches to the flap of the envelope for design continuity.
I (machine) used a narrow length of swirly mocha colored fabric for the elastic closure on front. I used at least twice the length of the elastic. Pinned it to the elastic. Set the machine for zig-zag stitch. Then pulled really hard on the elastic while sewing it so that it bunched up nicely and go that ruffled look.
(TIP: if you're going to try this: hold elastic from both ends so it doesn't dislodge from under the presser foot)
There is an extra flap that goes over the front. The elastic holder goes over it, for extra security of keeping any loose pages in while in your bag. I hand stitched the elastic to the outside back cover.
(TIP: If you're going to try this: I used embroidery thread, an embroidery needle & a thimble - to sew through that many layers... and remember you're just securing each end of the elastic, so you'll have to move the elastic that goes across it in front out of the way or it won't lay flat.)
Floral elements are held with a floral brad and glue.
Front decoration: I used a stencil of a bird I made (in Junior High) for both covers in black acrylic paint. That poor stencil has seen better days... After the stencil nearly dried I quickly went over it in black with a paint brush to cover up the 'mistakes'...
~ ~ ~ ~ ~
my hubby took these pics for me!
~ ~ ~ ~ ~
Please look but don't copy.
All comments, thoughts and constructive criticisms welcome!
~ ~ ~ ~ ~
xoxo,
Blueberry Blonde


.jpg)
.jpg)
No comments:
Post a Comment